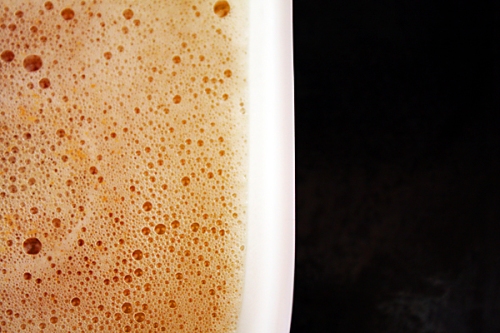
Ahh beurre noisette. It makes me want to speak French. But, considering that I spent five years in grade school LEARNING French, then when I entered Middle School, began studying Spanish, ended up stopping at Spanish II Junior year, and now resorts to Wikipedia and Babblefish to figure out foreign languages.
I’m imperfect, I’m sorry I have to tell you now. I hope you feel the same way about me.
Anyway, beurre noisette, or hazelnut butter, or better known as brown butter. Brown butter is basically a simple concoction of cooking butter on the stove until the milk solids separate from the mixture (kind of like adding oil to salt, the salt’s going to sink to the bottom). The milk solids brown (kind of like via the Maillard Reaction, in which sugars in foods brown and become more flavorful), and the remaining liquid is a different sort of milkfat that doesn’t separate, but doesn’t evaporate. What it basically is, is clarified butter. Yep! You can dip lobster in it!
But you’re not here for lobster…I’m not either.
I’m going to explain to you how to make the right brown butter without burning it, since it gets to that stage almost instantaneously. Lets go!

My secret here is using a frying pan. You can use a sauce pan, but a frying pan is easier to stir, I find that the butter is a lot more easy to burn in a sauce pan. Also, don’t use Teflon. Please don’t, keep that for your eggs and whatnot, the browned bits won’t stick to this pan, I assure you. Why no Teflon? You can’t see your browned butter bits! Before you know it, they will turn black and you will end up with black butter, which is something entirely different from what we are shooting for at the moment. Over medium heat, heat the butter slowly and until melted.

There you have it! I like to crank the heat up one notch. We here have an electric cooktop with the settings being from LOW to HIGH with the numbers 2-9 in between. So, I melt the butter at 6, then move it up to 7, and I leave it there. This whole process takes me a long time, about 5-15 minutes. I’ve rushed it before, and I ended up with blackened butter many times.
I assure you, it doesn’t smell nutty.

It will get a bit frothy before it actually starts to boil, and you will hear the boiling before you see it, it will happen. You can stir it every so often if you are very concerned, try a bit harder not to stir it much more than absolutely necessary. I find that when you catch yourself thinking “Am I stirring this too many times?” that’s when you are stirring it too many times. Stir it once or twice every couple of minutes, that’s fine.

Soon, the foam will start to dissipate, and what looks like foam will kind of just float on top. I think that these are just solids, because they won’t break up like foam. You can skim them out if you want, but I never do, I don’t see a point to it :/. Soon enough, the bubbles will get more frequent and thin looking, you’re halfway through at this point.

When you near the end, the bubbles start to slow a bit, and the sound of boiling will get a bit quieter. From the point, a foam will form on top again. I swirl the pan a bit once, just to be safe. Keep watching it, you will smell a warm, nutty smell, and I take it off when you see brown bits actually starting to form on the foam itself. Take it off when you first see those little brown flecks. Pour it into a bowl and get all of the brown bits off the bottom of the pan into there too.
If you look toward the top left corner of the picture, you can see some, I almost pushed it here.

You can use this in cooking and whatnot while its still liquid, baking too. But I like to let it solidify for about an hour or two in the refrigerator. The brown bits will sink to the bottom, so the color will seem like regular butter, don’t worry.

From this point, you can make anything! Anything like…oh…I don’t know…

Cookies?
Happy Baking!
Clara
